Using a simple scenario, this article explains how to create a brokered web service in SAP XI 3.0. In Part II, I will describe how to consume this web service in a Web Dynpro Application.
Scenario:
- User requests Customer Details via a Web browser
- Data is sent through WebAS to SAP XI using a SOAP adapter
- The message is then synchronously sent to SAP R/3 system via RFC adapter, and a BAPI call is executed to get the Customer details
- The BAPI response is sent to the WebAS to fulfil the user request
This part of the article describes how to create web services in SAP XI while the Part II deals with using the WSDL file to expose the web service using Web Dynpro.
Prerequisites:
- Good knowledge of SAP XI 3.0 concepts
- Basic knowledge of Web Dynpro Applications
Repository:
1. Import the RFC function module BAPI_CUSTOMER_GETDETAIL2 from SAP R/3 system.
2. Define Interface Objects:
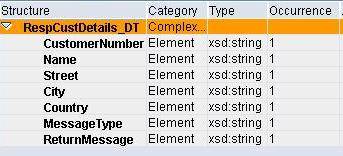
Data Types – ReqCustomerNo_DT and RespCustDetails_DT
Message Types – ReqCustomerNo_MT for data type ReqCustomerNo_DT and RespCustDetails_MT for data type RespCustDetails_DT
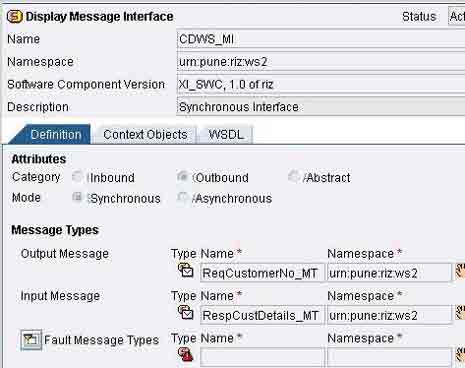
Message Interface – CDWS_MI (Outbound and Synchronous)
3. Define Mappings Objects
Request Mapping – Request_MM between ReqCustomerNo_MT and BAPI_CUSTOMER_GETDETAIL2
CustomerNumber to CUSTOMERNO
CompanyCode to COMPANYCODE
User-Defined function isNumeric is used to find out if the input contains only numbers or is alphanumeric. It returns true if the input string is all numeric. If the input string is numeric, function FormatNum is used to convert Customer Number to 10 digits and Company Code to 4 digits with leading zeros. If the input string is alphanumeric function toUpperCase converts the string to upper case.
Similarly, define response mapping – Response_MM between BAPI_CUSTOMER_GETDETAIL2.Response and RespCustDetails_MT
- CUSTOMERADDRESS.CUSTOMER => CustomerNumber
- CUSTOMERADDRESS.NAME => Name
- CUSTOMERADDRESS.STREET => Street
- CUSTOMERADDRESS.CITY => City
- CUSTOMERADDRESS.COUNTRY => Country
- RETURN.TYPE => MessageType
- RETURN.MESSAGE => ReturnMessage
Finally, define Interface Mapping – CDWS_IM between CDWS_MI and BAPI_CUSTOMER_GETDETAIL2 using the above message mappings and activate the objects
Directory:
1. Add a Business Service say SOAP_Service to your Configuration Scenario
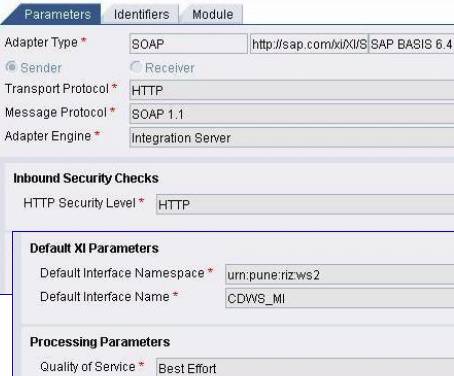
2. Add the outbound interface CDWS_MI and a Communication Channel say, SOAP_Client (using the SOAP Adapter) to the sender tab of the service
3. Define the Sender Agreement using the above objects
4. Create Business Service for the R/3 System if not previously created and add a communication channel using RFC Adapter to it
5. Define Receiver Determination object with the R/3 system as receiver and activate the objects
Defining the Web Service:
Once all the objects are activated, we can proceed to define the web service.
1. In the Integration Directory choose the menu path Tools -> Define Web Service… and choose to Continue
2. Specify the URL in the format below and Continue. Party name will be blank in our case.
http://<host>:<J2EEport>/XISOAPAdapter/MessageServlet? channel=<party>:<service>:<channel>
3. Specify the receiver message interface details and Continue
4. Specify the sender details and choose to Continue
In our case both sender and receiver message interfaces will be same as we are using a synchronous interface
5. Verify the details in the next step and choose Finish. Save the generated WSDL file on your desktop
The WSDL file thus generated can be used to consume the web service in various ways, e.g. by wrapping it around a Java proxy and exposing that Java proxy object in an EJB web service or by importing the WSDL in a Web Dynpro or Microsoft .NET Application. I will describe the second approach using the Web Dynpro Application in Part II of this article.


