In the previous parts, we covered transporting SLD objects and IR objects using CMS (Change Management Service). Now, let us understand how to use CMS for Integration Directory transports.
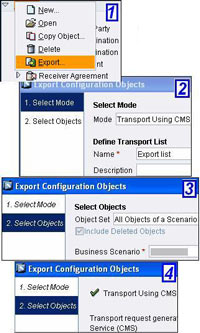
To carry out ID transports, open the Integration Directory of the source system.
 Right-Click the configuration scenario you wish to transport and choose ‘Export’ to open up Export Configuration Objects wizard
- Under mode, select ‘Transport Using CMS’
- Name of the transport list is ‘Export List’ by default
- Click on ‘Continue’
- If required, filter the objects to be exported
- Click on ‘Finish’
- Status message will be displayed on the next screen
- Close the wizard
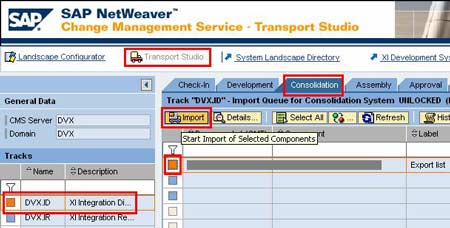
Now to transport the exported objects using CMS, access the CMS at http://<hostname>:<J2EE Port>/devinf
- Logon with XIRIG user
- Choose ‘Transport Studio’
- Select the ID track on the left
- Go to ‘Consolidation’ tab
- You will see an entry corresponding to your export from ID with state ‘Waiting for Import’
- Select the entry and click on ‘Import’
- The state will be updated with ‘Import finished’

Till this point, all the steps for IR and ID transports are same. Some more steps are necessary to complete ID transports.

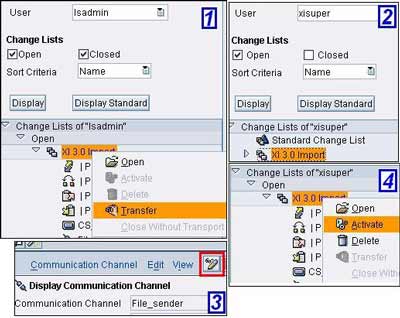
- Open the target Integration Directory
- Select ‘Change List’ tab.
- Select the LSADMIN user
- Click on ‘Display’
- You will see that the business system names will be those of the target system (For this to work correctly, you need to define business system groups and assign transport targets to business systems. For details on how to do this, see ‘Transporting Business Systems’ section in the first part of this series.)
- Right-click the change list and choose ‘Transfer’
- Now click on ‘Display Standard’
- Open the change list and modify the communication channels as per the target system e.g. IP addresses used in the adapters may be different in the source and target system.
- Activate your change list
Thus to summarize, we have covered the procedure of CMS transports for the following: