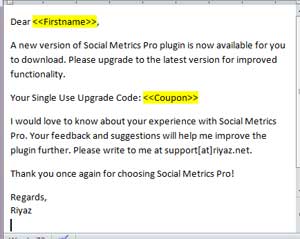
 Microsoft Office provides Mail Merge utility that you can use to send personalized emails or create personalized letters in no time. Creating each email or letter individually could take hours. Mail merge can automate this task so you can do it in minutes. It allows you to use a message template with some personalized fields like recipients name, address etc.
Just like my friend used mail merge, you can use it to send personalized emails to your friends for weddings and party celebrations. If you greet each recipient by their first name, they are going to feel good about you.
Businesses could use it to send personalized emails to their customers for example. The email might include coupon codes or software license keys which are likely to differ for each customer.
How to Mail Merge using Word, Excel and Outlook
Microsoft Word provides options to create emails, letters, envelops, labels, faxes using mail merge. We will take a look at how you can quickly create and send personalized emails using mail merge.
I am using Microsoft Office 2010 here. If you happen to use earlier versions like Office 2007 or 2003, steps would be almost similar. So let’s get started:
 If your contacts you want to send emails to are stored in Outlook, this step is not necessary. If not, then create an Excel sheet to store the details of fields to be personalized e.g. First name, Last name, email etc. Close the spreadsheet once you are done.
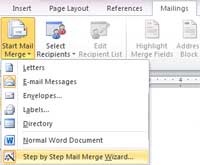
 Open Word. Choose Mailings -> Start Mail Merge->Step by Step Mail Merge Wizard.
- Mail Merge panel should open up on the right.
- Choose E-mail messages and Click Next
- Choose Use the current document.
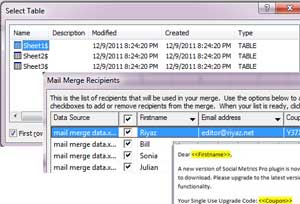
- Select Recipients. Here you can use Outlook contacts using option 2 or manually type in the details using option 3. For the purpose of this demonstration, we will use the list we created in Excel. So choose Use and existing list. Click on Browse and upload the Excel sheet we created in step 1. All contacts are selected by default. You can select the ones you want to send email to.
 Click Next to write your email message.
- Optionally you can add greeting line. To do this, click Greeting line. Here you can select the salutation format. If the column headings in the Excel sheet do not match the fields here, you may need to match these fields. To do this click Match Fields at the bottom and correct the field names as needed.
- Type in your message. Whenever you want to insert a field from Excel sheet choose More items from the right pane and select the field you wish to insert. Once you are done writing your email with personalized fields, click Next to preview the message. You can browse through the recipients to verify that it looks like you intended.
- Click Next to complete the merge. Click Electronic Mail. Type in the subject line. Click OK to send out the emails.
That’s how easy it is to send mass personalized emails using Office. We did this using a Wizard. Once you get used to with the steps, you could also do it directly using the menu options instead.
If you happen to use online email programs like Gmail, you can still use mail merge. Here’s the article that talks about how you can do this with Gmail – How to Mail Merge Using Gmail and Google Docs.
More Resources on Mail Merge in Word
- Use mail merge to send personalized e-mail messages to your e-mail address list
- Use mail merge to create and print letters and other documents
- Mail merge in Word 2007, Word 2010, Word 2003, and Word 2002
How to Send Mass Personalized Emails with Microsoft Office Mail Merge is a post from riyaz.net.
riyaz.net provides tech tips and tutorials for SAP Professionals and Bloggers (about).
Follow riyaz.net on Twitter, become a fan on Facebook and subscribe to get free email updates.